4 Steps for Making a Wall Sconce
Contents
– Step 1: Gather materials to create a wall sconce
– Step 2: Prepare the wooden bracket
– Step 3: Install the electrical wire
– Step 4: Connect and attach the sconce to the wall
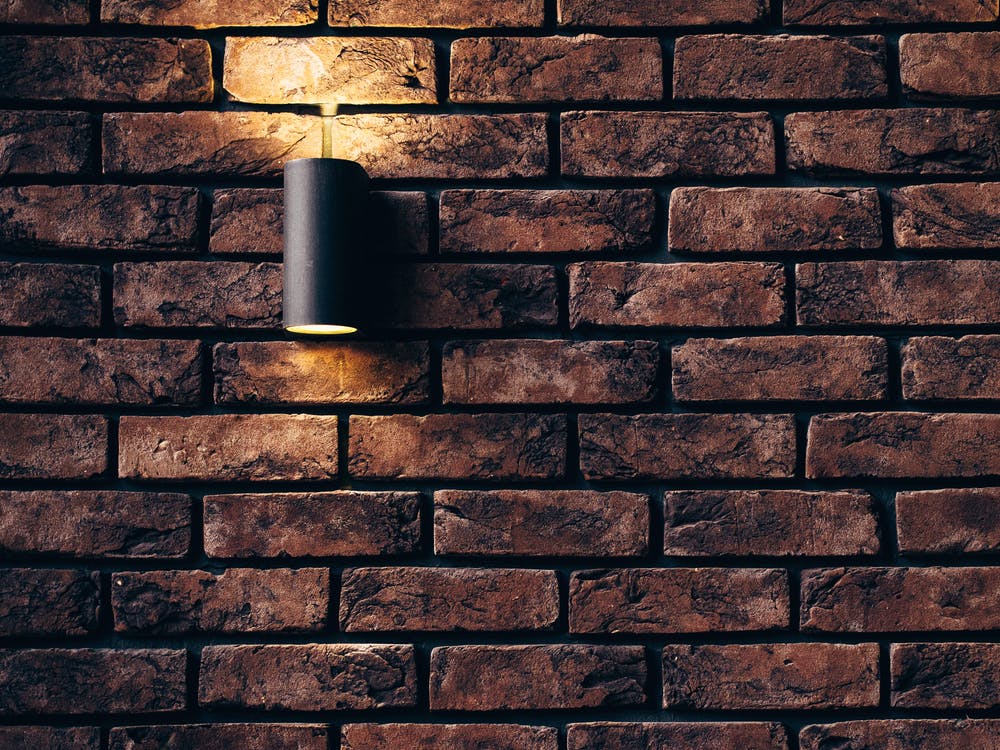
Wall sconces provide a soft light, which always gives a charming atmosphere to a room. In a living room, bedroom or hallway, it’s the perfect solution for subtle lighting.
Since it can be difficult to find a stylish and moderately priced wall sconce on the market, here’s how to make it easily and quickly for a very reasonable cost.
1. Gather materials to create a wall sconce
To create a simple and beautiful wall sconce, you don’t need many materials:
– a wooden bracket;
– a 3 × 1.5 mm² electrical cable;
– a socket for suspension;
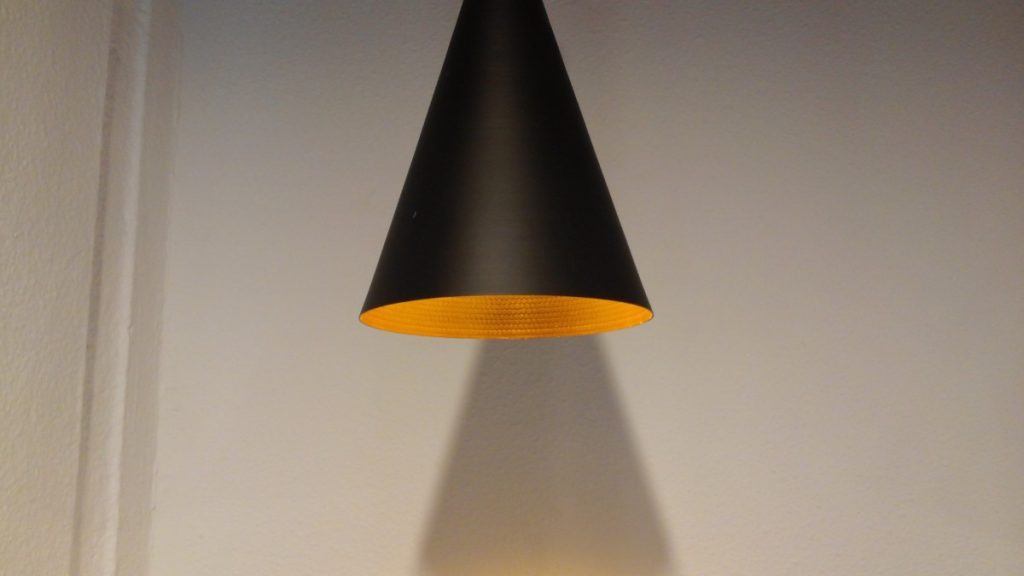
– a hanging lamp.
Materials needed to make a wall sconce
Pencil
Square
Tape measure
Drill
Wire stripper
Cutting pliers
Ruler 60 cm
Screws and dowels
Screwdriver
2. Prepare the wooden bracket
Mark 3 points on the bracket with a pencil: the first one on the stud that will be fixed to the wall and the other two on the top stud.
Then, using an electric drill, drill holes in the bracket with a diameter large enough for the electrical wire to pass through.
Tip: Depending on the shape of your bracket, you can also drill the crossbar if it’s more practical or attractive.
3. Install the electrical wire
Insert the electrical wire through the holes in the bracket. Be sure to leave a length of wire on the front so that you can adjust the height of the suspension later.
Temporarily position the sconce on the wall, and experiment to find the right height. Then cut the wire with pliers, and strip it to connect it to the socket. Adjust the length of the low wire by trimming it if necessary.
4. Connect and fix the sconce to the wall
Before installing the sconce on the wall, turn off the power at the circuit breaker.
Important: if the electrical connection point to the wall does not exist, you will have to create it.
Strip the low end of the wire before connecting it to the wall’s electrical system. Then, to connect the wall light to the wall, you have 2 possibilities, depending on whether or not it has a light connection device.
Connection without light connection device
If the wall lamp does not have a light connection device:
– Locate the 3 power wires:
◦ Red (the phase) is connected to the switch.
◦ The blue (the neutral) is connected to the circuit breaker.
◦ The yellow/green striped one (the ground) is connected directly to the ground.
– Strip the ends of the electrical wires about 7 mm using wire strippers.
– Insert the wires into the domino or connector on the wall and screw them in.
Connection with a light connection device
If the wall lamp is equipped with a light connection device:
– Unclip the domino from the light connection device, then open it by pushing on the lugs: you will then see the domino connectors.
– Pass the wires through the plastic part and connect them.
– Then re-clip the 2 parts.
Once your wall light is connected:
– Fix the bracket to the wall by pegging it with a suitable system.
– Connect the wire to the socket.
– Finally, install a light bulb and your suspension.
Hope this short guide helps you make your wall sconce. Remember to share your experience in the comments below.