

Tips to Knit Outstanding Bonnet for Baby
Contents
– Focus on knitted baby hats
– Step 1: Knit a sample
– Step 2: Measure your baby’s head size
– Step 3: Method 1: Knit a baby bonnet with straight needles
– Method 2: Knit a baby bonnet with circular needles
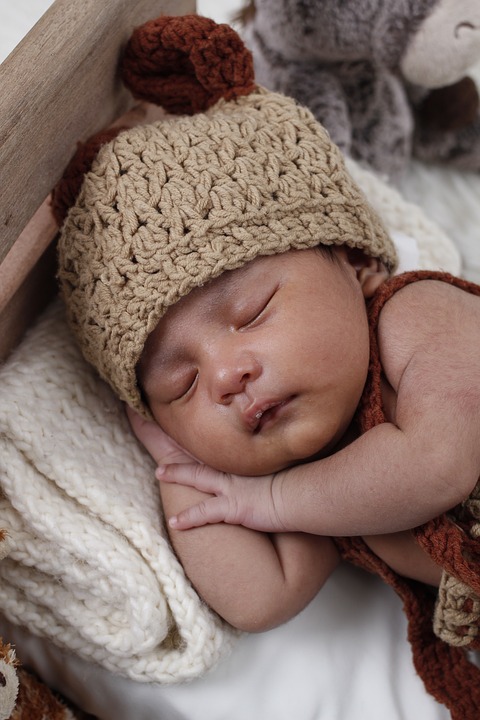
In winter, a baby’s head needs to be kept warm with a soft, comfortable hat. This accessory can be knitted in addition to a bra and booties to form a baby’s trousseau and be a gift for a young mother. There are very soft wools specially designed for a layette. Here is how to proceed for all those who wish to knit a baby bonnet.
Focus on knitting baby hats
Baby hats can be knitted in different ways:
– Flat or round: we start at the bottom of the hat and insert increases or decreases according to the model, to give a rounded shape to the hat.
– In shortened rows: the rounded shape of the cup is obtained by not knitting all the rows to the end.
Choose your material
Preferably use fine needles, straight or circular, no. 3.5 or no. 4 to craft a refined and cozy hat (i.e., 3.5 or 4 mm in diameter).
Choose quality wools, soft and warm. They come in pretty pastel colors, but white is always a safe bet, whether the hat is for a boy or a girl.
You can also personalize the baby’s hat by adding a funny pompom, bunny, or bear ears to get a unique and original model.
1. Knit a sample
Gather the materials you need to make your pattern. If you are a beginner knitter, ask a grandmother or an aunt who knits, or go to a business or person who sells small articles for sewing, dressmaking, and knittings, such as buttons, ribbons, and zips.
Then, before you start, make a sample:
– Knit a square at least 6 inches square.
– Count the number of stitches per 10 cm.
By using the knitted sample, you will know how many stitches to make.
For example, if your sample is 22 stitches with #4 needles, you will need to cast on 95 stitches for a 6-month-old baby bonnet, or : (22 stitches: 10 cm) x 43 cm [6-month-old baby ‘s]’s head size] = 95 stitches.
2. Measure the size of the baby’s head

It is advisable to measure your baby’s head size for a custom-made bonnet.
– Take a tape measure.
– Place it around the baby’s head, just above the ears.
– Join it to the middle of the baby’s forehead and take the measurement indicated on the tape measure.
Note: If you don’t have a tape measure, there are universal sizes for head circumference for babies from 0 to 24 months; for example, between 3 and 6 months, the head circumference varies from 40 to 43 cm; around 24 months, it is about 50 cm.
3.1 Method 1: Knit a baby bonnet with straight needles
Straight needles are perfect for beginners or those who may not have all the circular needle sets. All knitters have kept their grandmother’s needles, so it’s a good idea to use them to knit a bonnet.
Stitches used to knit in round trips
Stitches 1/1:
– 1 stitch right side, 1 stitch on the wrong side, and so on to the end of the row.
– In the next row, knit the stitches as they appear.
Jersey right side:
– Knit the entire row right side up.
– On the next row, knit it purl.
Cast on the ribs for the base
Using 3.5 mm needles, cast on the number of stitches needed for the cap.
For example, cast on 95 stitches for a 6-month-old baby hat with a head circumference of approximately 43 cm.
Add 2 stitches for the seam
Knit 2-3 cm of 1/1 ribbing (about 6 rows).
Note: Ribs are usually knitted with thinner needles: as they are tighter, they give a good hold to the knitting, the base of the hat does not distend.
Knit the rest of the hat in stockinette

With 4 mm needles, continue in stockinette for about 10 cm. You can decrease or increase the desired height of the cup.
At a total height of about 12 cm, start inserting the decreases by knitting 2 stitches together right side up: the reductions are to be distributed all along the row, at equal distance, on the right side of the work.
Note: To knit 2 stitches together, insert the needle into 2 stitches instead of 1 and knit them right side up.
Knit 1 stitch right side up, * 2 stitches together right side up, 6 stitches right side up *; repeat from * to *. There are 85 stitches left.
1. Knit row purl to purl.
2. In the next row, decrease by knitting 1 st right side up, * 2 sts. together right side up, 5 sts. right side up *; repeat from * to *. This leaves 73 stitches.
3. Knit the row purl to purl.
4. In the next row, knit 1 st right side up, * 2 sts. together right side up, 4 sts. right side up *; repeat from * to *. There are 61 stitches left.
5. Continue until 24 stitches remain.
6. Knit row purl to purl.
7. Continue by knitting the stitches 2 at a time. 12 stitches remain.
8. Knit the purl row.
9. Pass the yarn connected to the ball through the remaining 12 stitches, tighten and stop by passing the yarn inside the cap.
10. Tuck in the yarns.
11. Stitch the cap from top to bottom in an invisible stitch with the yarn from the ball.
Method 2: Knit a baby bonnet with circular needles
The hat is knitted in the round with circular needles, so there is no need to sew like with straight needles. You just need to mark the turn and pay attention to the stitches used because this knitting technique in the round is slightly different from the previous method.
Stitches used to knit the bonnet in the round
1/1 stitches: 1 purl stitch, 1 purl stitch for each round.
Jersey right side: Always knit right side up.
Set up and knit the ribbing
With 4 mm needles, cast on 97 stitches. Close the round by connecting the yarn of the ball to the first stitch cast on after sliding the stitches from the left needle to the right.
Slip a marker ring or yarn before the first stitch of the round.
Then knit in 1/1 ribbing for 2 cm.
Knit the rest of the hat in stockinette
Continue in right-side-up jersey for 10 cm, slipping the marker ring over the rounds.
At the desired height, make decreases throughout the row by knitting 2 stitches together.
1. Knit 1 stitch right side up, * 2 stitches together right side up, 6 stitches right side up *; repeat from * to *. There are 85 stitches left.
2. Knit decreases every 2 rounds.
3. Distribute the following decreases at the same level, removing 1 stitch between each decrease: * 2 sts. together, 5 sts. right *; then continue this way every 2 rounds: * 2 sts. together, 4 sts. right *; and so on until 24 stitches remain.
4. Continue by knitting the stitches 2 by 2. There are 12 stitches left.
5. Knit a round on the remaining 12 stitches.
6. Pass the yarn connected to the ball through the remaining 12 stitches, tighten and stop by passing the yarn through a loop to close the top of the hat.
7. Tuck in the yarns.
Did you like this blog? We’ll be back soon with these equally interesting topics:
- Knitting in stockinette
- Knitting in the round
- Knitting in the round
- How to knit with circular needles
- Bringing in the threads of a knitted fabric
In the meantime, don’t forget to leave your comments below!

3 thoughts on “Tips to Knit Outstanding Bonnet for Baby”