
5 Steps to Upholster an Armchair
Contents
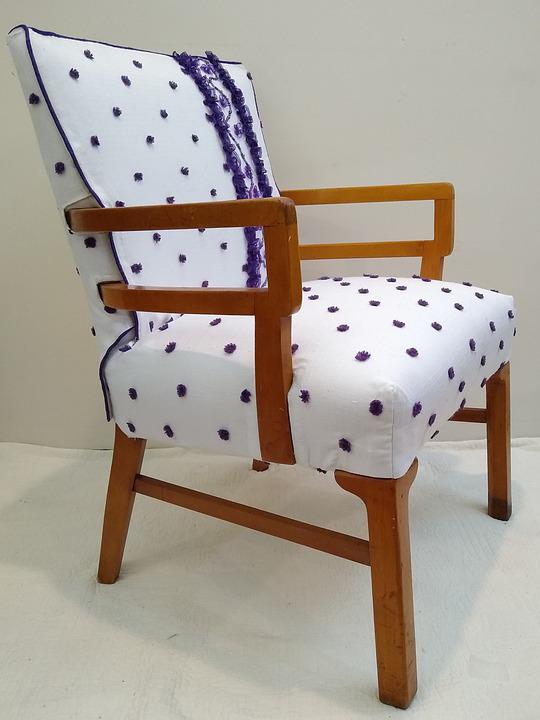
Focus on upholstery
Step 1: Distribute the upholstery
Step 2: Position the upholstery
Step 3: Cover the cut-out holes with batting and cotton wool
Step 4: Place the first button for the chair upholstery
Step 5: Finish upholstering the chair
Upholstering takes time, patience, materials – although some tools can be replaced with those you already have – and careful fabric preparation. Whatever the seat or chair, the technique is always the same, knowing there is a great deal of trial and error and adjustment throughout the work.
Here is how to upholster a chair.
Upholstery differs from buttoning in that it is made of hollows and solids, even without buttons, with a fold in the fabric. In contrast, buttoning is achieved by attaching buttons to the decorative material, which returns to its original shape if the buttons are removed.
Whatever type of chair you want to upholster:
- check that the structure and upholstery are in good condition, as the upholstery is made on the (white) fabric underneath the decorative fabric;
- clear the work area:
- either by removing the special upholstery fabric – a thin fabric under the chair to protect it from dust – if you are upholstering a seat;
- Or remove the decorative fabric from the back if you are upholstering the back.
Good to know: if the back of the chair is covered with a one-piece fabric, removing a large part of it is challenging to make the upholstery… unless you agree to change it completely.
1. Distribute the pads
The number of buttons – and their location – depends on the surface and the aesthetic aspect you want to obtain. However, keeping a distance of at least 15 cm between each button is advisable, bearing in mind that the first button can be 10 cm from the outer frame or 3 cm or even 3.5 cm from the bowl.
The seam on the outer edge is called a “trough” and can be felt under the white fabric.
There are no rules about the number of buttons and the distance between them, but the size of the chair plays a decisive role: the larger the chair, the greater the distance between the buttons, and the larger the buttons can be.
You can make a scale drawing of the upholstery on your computer or on kraft paper, which will give you a better idea of the number of buttons and their distribution on the fabric.
Good to know: you can have your buttons covered or do it yourself; haberdashery has kits for this.
2. Position the pads
Use tapestry pins, a ruler and a felt-tip pen to position the pads, i.e. the bulging parts.
Starting at the bottom left of the fabric, measure the location of the buttons with a ruler.
Work row by row and from left to right, placing a pin where a button will come, knowing that all buttons will be staggered and equidistant.
Make sure that all the pins come in precisely the right place.
Then replace each pin with a cross drawn with a magic marker or make a cross stitch with a needle and coloured thread.
Good to know: the usually pink magic marker fades after a while.
Cut each cross, starting from the heart, with a pair of sharp scissors.
3. Cover the cut-out holes with batting and cotton wool
The batting is used to hold the batting in place, and both allow the finishing fabric to sink into the layers with the button for comfort and beauty.
Cut a piece of batting to the size of the area to be covered.
Cut a piece of cotton wool 4 cm larger in length and width.
Place the fleece and cotton wool on the white fabric and pin them together at the edges with tapestry pins.
Tip: on a backrest, it is necessary to support the top edge with small 10 mm wide-headed nails (upholstery seeds).
Use the ruler and your measurements to ensure accuracy.
Spread the two layers horizontally by about 2 cm at each hole.
While holding the tape measure, put your thumbs in the centre of the gap between 2 openings on the first row, and note the measurement.
Do the same for the second row, and repeat for all the rows on the chair, from the centre of the hole to the centre of the next hole.
Each time, the measurement should be almost the same: this distance you get between the buttons is larger than the original measurement, which you don’t have to take into account anymore.
4. Place the first button for the upholstery of the chair
Upholstery is made on the decorative fabric with quilting twine, that is, thick linen thread. Using a synthetic thread and a 2-pointed square of 30 cm or more is also possible.
Cut lengths of the thread of about 60 cm; allow for as many as you have buttons.
Measure and cut as many pieces of webbing as you need about 2.5 cm.
Lay the finishing fabric to cover the chair.
Thread the string through a button, then thread both strands through the eye of the square at the same time.
Place the first button in the middle of the first row (at the top), stitching the square through all the layers at the hole made under the fabric.
Tip: Touch the cover fabric to mark.
While holding the tile straight up, slide your other hand under all the layers to retrieve and pull it and the string.
Release the string from the frame and pull it out: the button remains on top.
Turn the chair over so the string is facing you.
Make a noose:
Form a loop with the end of the string by holding the 2 strands between your thumb and forefinger where they meet; you have the shorter strand on the left or right, depending on your hand.
Still holding the two strands, pass the free end around the base of the loop: the string then wraps around your thumb.
Bring the free end back through the loop, towards the front, making a second turn.
Then pass the string through the two previous turns, from top to bottom.
Fold a small piece of webbing over itself and pass it through the loop of the noose.
Tighten the noose on the webbing, and at the same time, push the button to the desired depth.
Place all the other buttons in the row on either side of this first button.
5. Finish the upholstery of the chair
For the second row, the one underneath also starts in the middle.
Form the folds as you go along, between each pad, making sure they are always facing the same direction.
When the pads are finished, check that all the buttons are at the same depth: if necessary, tighten or loosen the slipknots.
Then form all the folds of the outer cushions, always in the same direction, before folding the fabric under the seat (or behind the backrest) and securing it to the wooden frame with 13 mm seeds.
Tie 3 single tight knots for each strand of string holding the buttons.
Cut the string leaving 1 cm.
Place or rest a unique upholstery fabric under the chair with 13 mm seeds.
Hide the seeds around the edge of the chair with a braid, piping, etc., if necessary.
Tip: Turn the vertical folds downwards for the backrest to avoid dust retention.
Materials needed to upholster a chair.
Sewing needle
Straight two-pointed trowel
Dressmaker’s scissors
Felt
Sewing thread
Household items
Tape measure
Paper + pencil
Ruler


One thought on “5 Steps to Upholster an Armchair”