How to Use a Sander
Contents
– Some helpful information about sanders
– The vibrating sander
– The circular or disc sander
– The belt sander
– The angle sander
– The mini sander
– The giraffe sander
– Choosing a sander according to the material to be sanded
Nowadays, sanders are much lighter than they were a decade ago. Using a sander is, therefore, relatively simple.
Whether they are belt, vibrating, eccentric (circular, disc), or triangular (angle or corner), sanders are pretty affordable (starting at $20) and are also available for rent. Suctioned or not, these sanders can be used by any DIY enthusiast.
Some helpful information about sanders
All sanders can be purchased or rented from rental stores or home improvement stores.
Most sanders are equipped with self-gripping plates on which a velcro system glues the sanding paper. Concerning the belt sander, the sanding paper will be fixed after opening the plate and inserted inside it.
Please refer to the instruction manual for each sander when you buy or rent it. These may vary from one sander to another, depending on the manufacturer.
Finally, when handling a sander, whatever its type, it is important to connect the plug of the sander to an extension cord to work with ease while moving around the part to be sanded (door, furniture, shutter…).
The vibrating sander
The vibrating sander is used on soft materials such as plasterboard or softwood. It will be perfect for finishing on solid parts (like a door, for example).
For this type of sander, it is easier to use fine-grain sandpaper.
With a low output, the plate of vibrating sanders does not “roll” or “rotate”, making it possible to remain on the same part of the wood without digging it.
The circular or disc sander
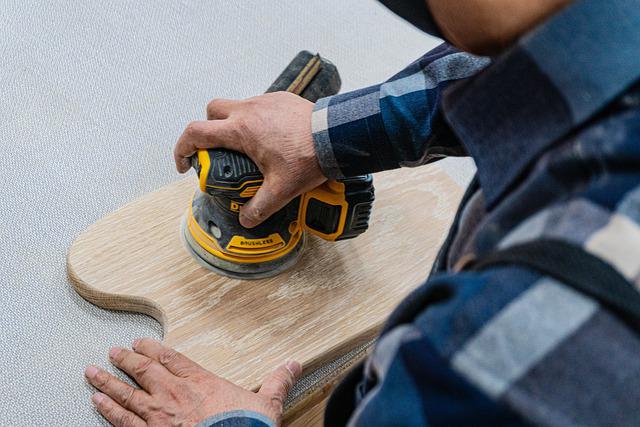
The circular sander is mainly used for rough and finished sanding on large surfaces (such as a wall). It can also be used for sanding paint, metal, or hardwood.
Relatively robust, this sander must be held firmly. Sanding is done with regular, circular motions so that the circular sander does not dig into soft materials such as wood or plaster.
The belt sander
The belt sander can be used on all types of materials. Handle it with smooth, even strokes, regardless of the sanded material. Please do not leave the belt sander in one place, but keep it moving. This will prevent damage to the surface from being sanded.
The belt on this sander rolls to provide rough and finish sanding on solid surfaces.
The angle sander
This is the ideal sander for finishing. It has a triangular plate (hence its name) which allows, by its points, to reach the smallest places (such as blinds and moldings …).
The angle sander is used for all types of materials.
It is easy to handle from left to right or from top to bottom, thanks to its small size.
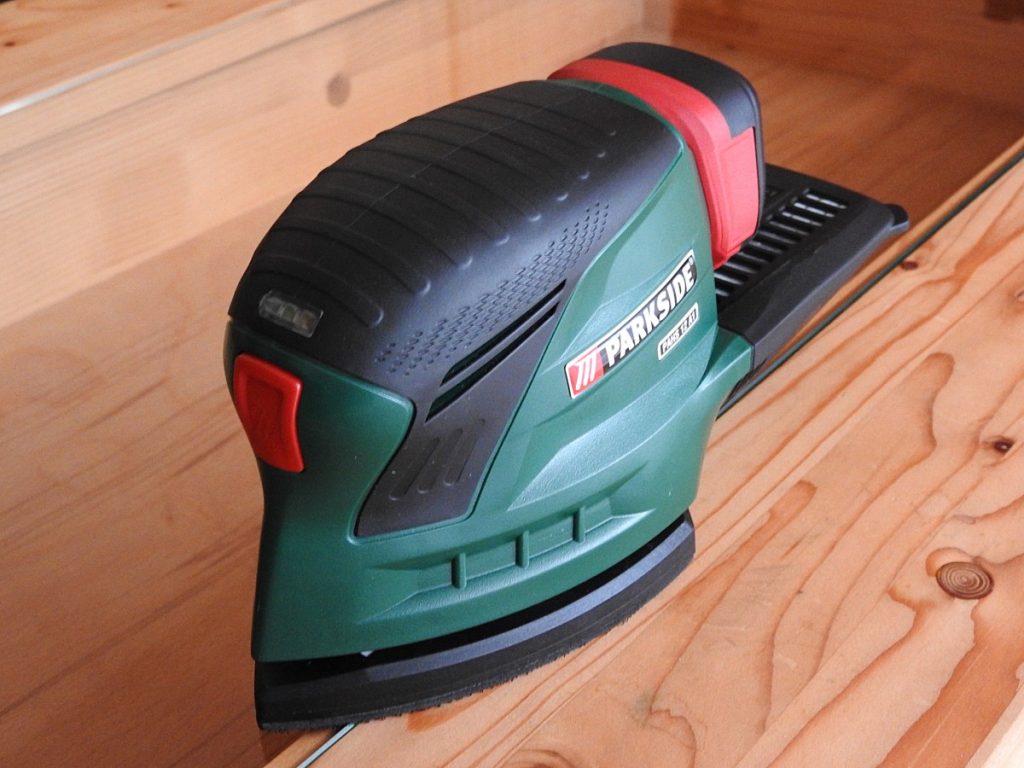
The mini sander
The mini sander is often forgotten. However, the mini sander allows the sanding of small inaccessible areas, even with a triangular sander (such as complicated moldings).
The mini sander can be used for all types of materials.
This type of sander is equipped with a rod system with an abrasive paper tip that sands the smallest surfaces by rotation.
The giraffe sander
The giraffe sander is used for sanding large surfaces such as parquet or ceiling. It is equipped with a telescopic arm and allows easy sanding in areas where the position could be uncomfortable.
This sander is placed on a cart that facilitates its movement in most cases.
Connected to a vacuum system, it allows removing a maximum of dust during sanding.
Choosing the sander according to the material to be sanded
To sand, a floor with a large surface area, use a large sander, which you can rent.
When sanding concrete, use an electric concrete sander.
If you want to sand wood (whether it’s furniture, stairs, beams, tables, doors, or any other piece of wood), use a belt, disc, or angle sanders.